Total Pageviews

Saturday, April 16, 2011

Starting out part XIII

 Hello there, I see that it has taken me too long to post this update. I wish to apologize for the inconvenience this may have caused you. I am at this time working to rectifying the situation so as to insure that I can post on a more regular basis.
On related note, the Slow Burn league has gained a few new members. I will post their pictures and short intro as I get them taken, written down and of course get permission to post them. Yes I do ask for permission. So now then lets get to the meaty bits of this post eh?
Previously on A brush, a paint, and a mini; I applied the initial base coat on Sorcha.
In this post We will finish up the base coating process and I will also expand on the aspects of painting a character model. So shall we begin?

First I should mention a little more about painting character models and what that entails. Character models in all games and miniatures lines are extra special pieces, they usually have more detail and tend to be a little fancier. They also have more personality to them and that presents a few more challenges than painting regular non-character models. In the case of Sorcha we will need to keep in mind what her personality is like. According to the fiction writer at Privateer Press, Doug Seacat, she is as cold as ice, a frost maiden. We will need to keep that in mind when we paint her while at the same time not allowing this fact to keep us from painting her in a way that keeps her tied in with her army. While her armor should provide the tie in, it is her face as well as some of the secondary effects that we will paint that will show her personality. Painting Sorcha will also give you some experience on painting infantry models as well, so it is like killing two birds with one hand cannon shot. As I have already covered the preliminary base coat on the model in my previous post I will skip that step and move on to the next one.
In this case I will do a little bit of clean up, touch up the base coat and reevaluate her color scheme. As I was looking at her I decided that the gloves needed to be painted black. And some of the armor plates needed an extra coat of red paint. While the boots also get a treatment of Thamar Black.This also helps tie her in with her 'Jacks.
While I am at it, I painted her hair black. This way her hair will provide a greater contrast against the pale skin tone that I have chosen for her. One thing to note is that I have already painted her weapon Coal Black, when I was working on the Juggernaut and Destroyer.
Next I start to look for where all of the leather parts will be. In this case its her gun holster. There are some straps as well, but I think that I will paint some of them black. The handle of the gun as well as the holster will be painted with Gun Corps brown. I then water down some Gun Corps Brown and proceed to paint.
I got a little overzealous with the water and thinned the paint too much. So I took the above picture to show you what happens when you put in too much water when thinning down paint. Not to worry, it's not the end of the world. And while the paint was still wet I opted to use it as a base color for the hat as well.

While I am waiting for the paint on the model to dry, I will mix some Jack bone with the Gun Corps Brown that I already have on my palette. I was going for a 2 parts Jack Bone to one part Gun Corps Brown. This mixture will be applied to the hat and fir trim on the coat.
Make sure to rotate the model as you pain to catch all of the details as you go.
Now that the fir hat and trim have gotten their base color. Its time to mix up some thing for the skin. The skin is one of the trickier parts on a model to paint. Unlike other materials, like leather, metal or even cloth. Skin has seemingly contradictory properties. It is smoother than cloth for example and often times can appear shinier. However it is softer than metals and duller and at times rougher in texture than leather. We have to keep this in mind when painting faces, hands and other fleshy parts. On the plus side base color for flesh is a mid tone. So that you can shade and highlight as you see fit. With that in mind and also keeping in mind that a person's skin isn't always uniform in color I begin to mix my base color for Sorcha's face. To do that I add two parts of Ryn  Flesh to one part of the Jack Bone mixture that I used to base coat her hat and fur trim.

Looks cold, doesn't she? Good.
Well that is it for this week. In my next post I will, fill in that primer colored spot on her chest, clean up the weapon and base coat it, as well as her side arm. I might even get to do her preliminary highlights and shadows.
Until next time.

Monday, March 21, 2011

Starting out part XII

So a couple of posts ago I wrote that I would be basing the warjacks(tm) and then move on to Sorcha. This was not meant to be, as I mentioned earlier in Post 6. I have decided that it would be best to finish the base painting and base highlights on Sorcha before moving on to the finishing touches. So without much ado lets begin.
For tonight's post I would like to introduce you to a new color.
Great Coat Grey. It has a bluish tint to it and it gives a heavy felt appearance to any clothing that you paint it on. Then again that could be just my imagination. All the same I picked it because it is part of the color scheme that Privateer Press uses for their Winter Guard models. That and I haven't had the chance to play with it yet. I might even paint it on the Juggernaut and Destroyer to give them a better tie in with Sorcha. Sorcha's in game fluff should answer any questions as to why I would want to match her to her infantry units. (was that a spoiler? maybe.)
Now for the rest of this post I will be using my trusty base brush. It's a size 00 that I had lying around and it is still in decent enough condition.
I will also use Khador Red Base:
In the middle
So now we move on. Here is Sorcha. She is primed and ready for painting. I believe that I covered the cleaning and primer process in earlier posts.
You will notice that her weapon is already base coated with Coal Black. I did this at the same time as her robot friends and for the same reason.
So to get started I load up my brush with Great Coat gray, spread it on my palette and then thin it down to a two parts water and one part paint ratio. Then I begin to apply it to the model.

Like all colors, paints etc. I prefer to apply about two to three thin coats instead of one thick coat of paint.
It takes longer, but at the same time gives you more control where the paint goes and how much coverage you get. Plus its also easier on your brushes as well.
You don't have to start with the Great coat gray. Though the same applies for whichever color you choose to start with. For the Starter box I opted to paint her cloak, coat and sleeves gray.
Although the sleeves are a little hard to see.
As I add the red you will be better able to differentiate between the Great coat Gray and the rest of the model. I would like to mention that it is better to apply 3 to 4 coats of thinned paint to a model than to do a massive cover all coat. This way you can keep all of the detail and not wear out your brushes too soon.
Now let's move on to the red.
I will apply the Khador Red Base to her armor plates to tie her in with her robots. Err 'Jaks(tm). Since red paint isn't very opaque it will take several coats to accomplish this task.


This is just the first coat. The color becomes brighter with each successive coat of paint.
She looks much better doesn't she?
This one was taken after the third and fourth coat.

Well, I will leave you now as I need some sleep. I will post and cover the rest of the base colors for the leather straps, hat and fir trim as well as the weapon.

Sunday, March 13, 2011

Hey, it's Post 6

By now you are wondering where I disappeared off to. Well this will be a lengthy answer so I will give you the short version.
I had to replace the router i use at home and on top of that my internet connection has been rather unreliable due to the effects of rain on WIMAX frequency waves. I also got a new job and so I have to get up at 5 am pacific time (US) to be able to get to work on time. This is a good thing as it gives me money with which to pay for things like internet bill, electricity, paints, models and food. That last one is important. And it makes my girlfriend happy, also important. So hopefully sometime soon I will get a better internet connection and be more regular on my posts.
What you are looking at is a combination teaser and an attempt to tell you what the next post will contain.
After due deliberation the Senate has decided that basing the Juggernaut and Destroyers do not need to be based at this time, and are happy to see that basing them is far from my thoughts. Instead I will paint up Sorcha and then base all three models and finish their highlights. This is because i have been having a hard time getting to the appropriate stores in time to be able to acquire the materials to base the models. I do have the plastic bases that they should sit on but that is hardly enough. And besides you have waited long enough for Sorcha. She is also an opportunity to show you how to paint a living model, applicable to troops, and a character to boot. Warcasters are characters so Sorcha counts. The silverish blob is actually a Buccaneer that will be cleaned and painted for Cat in exchange for all of her hard work taking the pictures that you get to look at every post. I will be posting the progress for this piece as well as I work on it. Which I hope satisfies the need for a metal model tutorial for now.
Well that is it for now. I am going to go to bed and get some of that thing called sleep before i have to get up in the morning for work.

Sunday, February 27, 2011

Hey, it's Post 6

Once Again it is Post 6. Did you miss it? I can't tell nobody leaves comments. I can't tell weather you like it or not.
Anyway I am posting this updates because there is only one day left on my poll, its right there on the right, and I really would like it if you cast your vote. This would help me a lot. In fact I will be putting up many, many polls so that I can a) get to know you the readers, and b) decide on a direction for the blog, actually picking the models to paint.
Thank you.

Wednesday, February 23, 2011

Starting out part XI

Wow, it's part eleven already. It seems to me I just started this blog not too long ago.
Well as promised it's time to work on the highlights on the models. This isn't the end, as the very final highlights and shadows will be applied after the models have been attached to their bases and the bases have been decorated with turf and the like. Collectively this process is referred to as basing. I will handle basing in the next post. For now let's do some highlighting.
Watchout this is going to be quick and possibly dirty as I am one post behind schedule. For this reason i am showing both models together. A this point they are receiving the same treatment, albeit at a different time.
So here we have both of them.
I intend to make the highlights a bit on the bright side, simulating a midday sun. So I have to be a bit careful about how to handle the less pronounced highlights. Some knowledge of how light reflects and refracts can be useful in this endeavor and thankfully there are tutorials out there for those of you that are willing to spend an extra ten seconds looking for them. ( Actually the amount of time it takes is entirely dependent on your internet connection speed.) Now, those orange areas are actually three layers. Layer one is a 2 part Khador Highlight, 1 part Khador Base, and one part water. You may want to thin the mixture to suit your tastes. Layer two is just one part Khador highlight and one part water applied after layer on has dried. I didn't go all the way to the edges of layer one. I painted a smaller area over layer one. Layer three is a two part Khador Highlight and one part Cygnus Yellow. I was tempted by Sulfuric Yellow (sometimes labeled Sulfuric Acid) But decided against it. This was a tricky layer to apply as I used a new technique for the very first time. This is a two brush technique and requires a lot of practice and patience. It is more evident on the shoulders which is where I used it. What I did was to paint a line with the paint using my main brush, and then to drag it out with a dry clean brush. I used my dry brush for this second part. you have to be careful to touch and drag just the edge of the line.
Did it work? not too well? Ok, well neither did mine.
See? Don't worry with practice we will get better. And there are ways of fixing that anyway. This is also a base highlight if you can believe that. So we will be shading this a little later and after these models get their bases and final shading we can apply the last and finishing touches of highlighting. So to mitigate this extra bright orange we are looking at, I clean my main brush, load it with Khador Red Base, smear the paint on my palette and with a different and clean brush I dilute the paint to a wash like consistency. this is usually three to four parts water to one part paint ratio.
So why did I use a clean brush to add water? Well it's because I don't have an eye dropper. Yet. They are rather cheap and I really don't know why I haven't bough one or a dozen thus far. I suppose it just slipped my mind. More useless facts at no extra charge.
At this point i am starting to think that I am missing the picture that illustrates what the wash did.
There, nothing a 5Mpx Phone camera can't fix. Well that and Photoshop... Is the contrast good enough? I hope so. So the wash evens out the tones without removing the effect of the highlight. This is a low level highlight. Think ambient light. The direct light highlights will come later as I have mentioned before. A long with them we will also play with a little bit of reflected light as well. So what do we do Next? Well the axes got a nice treatment of quick silver on the "cutting" edge of the blade. i had watered that down to a one part paint and two parts water. It ended with a nice pattern on the Juggernauts axe that gave it a frosted look. Rather appropriate for an Ice Axe if you ask me. I will have to do something to add to that and enhance the frost look on it. the edge on the Destroyers axe was a little more muted. There are a few parts that also will need to be highlighted but they will wait untill the models have been attached to their bases.
Now, i hope that you remember when i painted the eyes white? I will give you a  quick recap. What I did was to water down one part Morrow White (any white will do) with two parts water. Then using the fine detail brush I gingerly, as gingerly as I could considering how much coffee and Mount@in D3w that I had consumed, painted the eyes white. Wait the coffee comment applies to this next bit, so please copy and paste here. Next I thin down Cygnus Yellow 1:2 ratio of paint to water and after the white has dried I gently wash it over wit the yellow. To the thinned yellow I add a little bit of Khador Red Highlight, this is an arbitrary amount so add as much as you think suitable, but not enough as to constitute one part. Now this part is a little tricky as well. And a little messy. I wash the yellow a little with the new darker mix, this gives it a nice fiery appearance. As for the edges of the face plates that I hit with the brush? Well I give them a gentle highlight with a little extra yellow and get the effect of the inner glow reflected on the outsides of the face.

Well that is it for now. In my next post I will attach these bad boys to their bases, turf them and finish the highlights and shadows. After that I will move on to painting Sorcha. She has a different feel as she is both a character model and thus deserving a little extra love. And she is a living model and as such has a different approach, human skin isn't shiny like robot skin/ armor. Exciting isn't it? I can't wait.
By the way, on the to right of this page you may have noticed a poll. Well I post these to get a better idea as to who you are and why you are reading this. I hope that you find it helpful, but i need your help. Please take a few extra seconds and click on an answer to the poll. Thank you.


Saturday, February 12, 2011

Starting out part X

  And just recently I was talking with Cat about writing the update for this week. I am also trying to figure out what to do with Post 6, as that is going to be a regular feature within this blog and not just random filler to keep me in the habit of posting on a regular basis. Well I look forward to how this blog will grow and evolve over time. Did you know that there were ninety of you reading this last month? I check the stats, but enough of my rambling. Its time for part X. which was originally intended to be part VIIId. So lets finish up with them metal coats eh? And then of course move on to the highlights.

So with out much ado this is going to be quick and dirty.
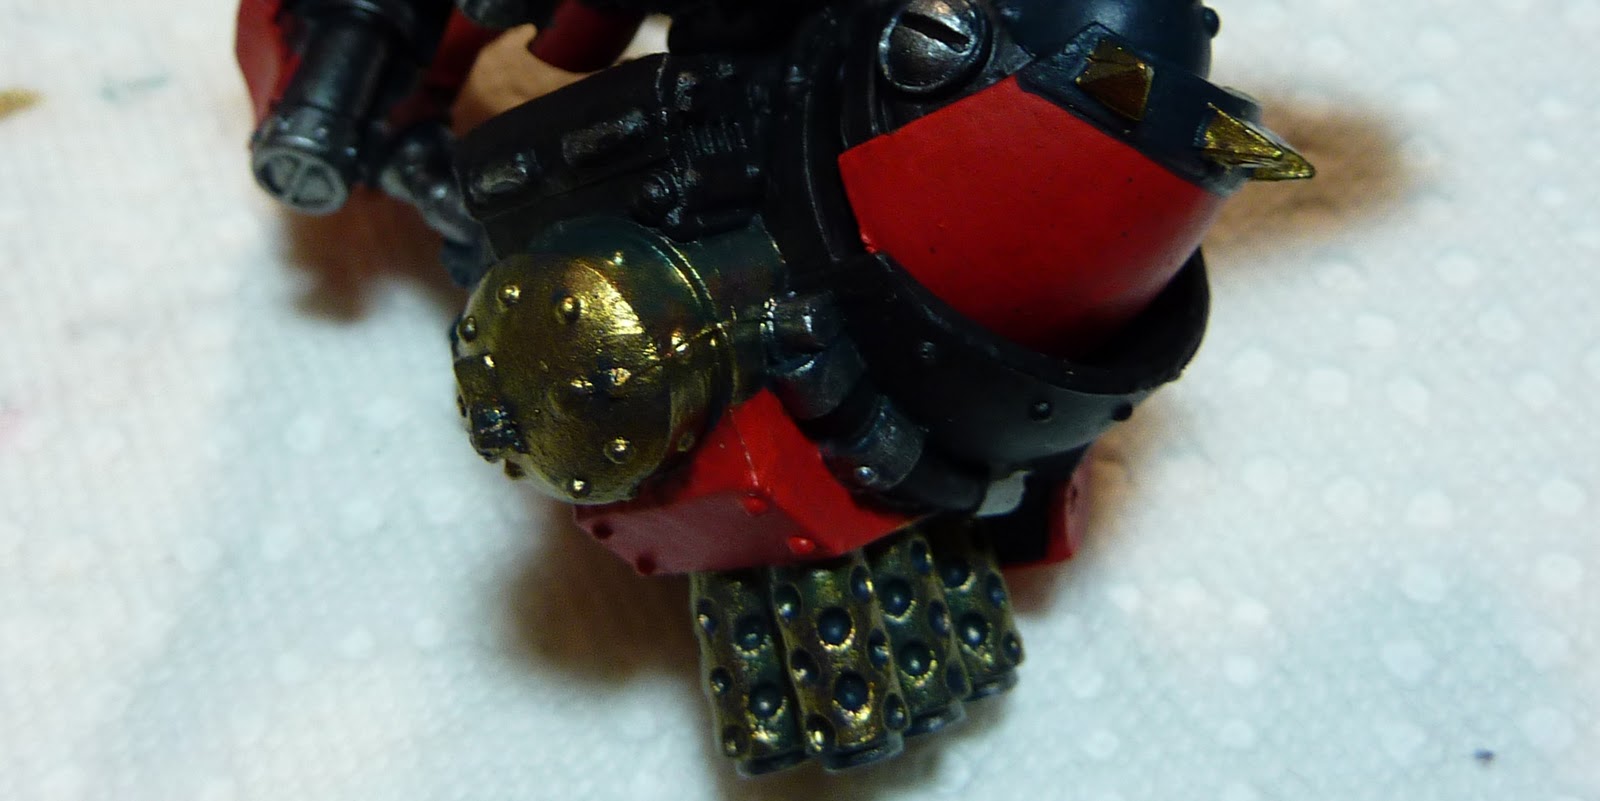
In the above image you see that the leg pistons are still in the Coal Black base color. I have also painted the heels the same as well as parts of the feet. The "toes" were painted black as that was the originally planned color scheme. With the exception of the trim on the shoulders, that's where the shoulder spikes are, every part that is based in Coal Black will be painted in Pig Iron. Also I painted the ammunition in brass as well. I did that because all modern munition casings are made of brass. this has been standard practice in munition manufacturing since the middle of the 19th century. And to tie it in better as well as to break up the monotony of the color scheme I painted the knob, I prefer to think of it as the firing pin, in brass.
There, fast wasn't that? even the photographer was surprised. A few more little details. The furnace looked rather dull, so I accented it with Pig Iron handles, and in the end I decided to mix Pig Iron and Thamar Black in equal parts 1:1 ratio to give it a cast iron look. And while I was mixing paint I mixed a 1 to 3 parts ratio of Brass Balls and Coal Black which I then thinned a little bit and used it to shade the boiler.
While I am at it I will add some to the smoke stacks as well. The total shading isn't done yet, nor have I started it in earnest either.
As i have a tendency to jump around from one part to another I move on to the "belly" of the beasts. Mind you I am doing the same to both the Destroyer and Juggernaut so don't worry about which model I am working on. The main pistons got pig Iron and the round parts that join to the hips are brass. Once again to break up the color scheme and make the model a little more interesting to look at.
Did I mention the part where I painted the Eyes white? I had to use the detail brush for that. it came in handy and so far it has kept its tip. A good way to preserve your brushes is to keep the straw like cap that they come with and replacing it on the brush when you are done with it. After the eyes I switched to my regular brush and painted the edge of the axe with Cold Steel. After a little time I saw that the difference in contrast was insufficient and I shook up and then opened the Quick Silver pot, thinned some of it with water and painted the Axe edges on both models. As I am looking at them I see parts that will need to be cleaned up, but that will come later.
However while I am on the subject of cleaning. That stray stroke of Pig Iron will get a coat of Thamar Black.
At this stage i have painted the feet as well. I wasn't sure if I would like the effect initially, but it seems to work. Besides it may get covered when I finish the base with mud and stuff. I also notice that the collar rivets have been painted with either Cold Steel or Pig Iron as opposed to Brass Balls on the Juggernaut. It doesn't really matter which honestly. Well I am not going to change it now, as both bodies looks so alike. They are the same chassis design and when I am making fast decisions during a game it helps to differentiate between the two.
I also painted the holes in the axe white. In the original artwork that part glow blue. Also see where I shaded the boiler with my mixture of Coal Black and Brass Balls. As Noted elsewhere in the blog Coal black makes for a nice shade for brass components. And while you can;t see it I did paint the eyes on the Juggernaut white as well.

Here is another angle of the Juggernaut's back. and below is the Destroyer for comparison.
And with that we are are ready for the highlight and shading part. which will be a post on its own.

Wednesday, February 9, 2011

Hey, it's Post 6

So a quick little update before I post more painting stuff. Every once in a while I hop on the websites of the miniatures companies that produce products that I fancy. Today I found this:

Another interesting link was shared by a friend of mine. I think I might pick up a few of their figures. http://www.mercsminis.com/

Well, that is it for post 6. I will be back with our regularly scheduled post.